I had the opportunity to use a really high quality camera. I would have used this to re-take my main image and background.
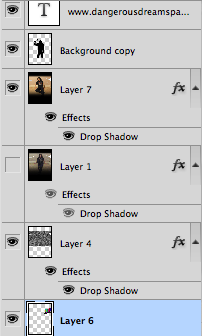
This is the new re-taken shot. Despite the high quality, it also feels more saturated than the previous shot. It wasn’t too hard re-erase some of the background for thelocation tears. In the layer boxes in Photoshop, there is an icon of an eye on the left side of the box.

The eyes indicate that the layer is visible, you can see that the old image currently doesn’t have an eye beside it, meaning that it’s not visible.
If you press the eye, it is supposed to hide certain layers, making them invisible until you re-click on the eye. All I did was hide the re-taken shot and remembered the areas wear the tearing was positioned. After you’ve found an accurate location, you can start erasing.


After this was done I had to put in some reviews. The review would be an example of how the ancillary tasks link together.

I’ve also made another update on the 3 top titles. Instead, the titles will just be the same font but in a smaller font.
I now think that I’ve finished my film poster. I’ll post the poster with the rest of the coursework on a “Completed project” post soon.
